Color has taken possession of me; no longer do I have to chase after it. I know that it has hold of me forever… Color and I are one. I am a painter.
The art of watercolor has been around for many years. The fundamental practice of mixing water with color and using it to bring images to life can be found in so many different forms. Artists and crafters have used paint pots, watercolor crayons, watercolor pencils, inks and dyes to apply color to a wide variety of surfaces using many different items to gather the pigment needed to paint with.
The tools used to apply the color have varied from a simple paintbrush that needs to be dipped in water, to water brushes with barrels that can be filled with water to allow the user control over the amount of water being used while applying color. Each color medium and tool used produces a different end result. In this book, we will be using watercolor pencils to demonstrate the basic technique of watercoloring. You will note the high vibrancy of color in our sample project.
Although it may be more vibrant than you are accustomed to, you will be better able to see the technique in a step-by-step process. Because each medium and application of that medium will vary by user, you are encouraged to practice, practice, practice. Aside from the actual color medium and tool used to apply that medium, there are a few other items that you need before you get started. First you will need a water- proof ink that will not run or feather when it gets wet.
There are many inks on the market that are suitable for this type of work—some are solvent-based, some are pigment-based. It is best to stay away from water-based dye inks as they tend to be unstable, and while it may not run in one section of your watercoloring, you may find it highly distressing to see it begin to feather and run just as you finish water- coloring your image. You will also need thick card stock or watercolor paper.
Watercolor paper is known by its rough or “toothy” texture and will help give your project an authentic watercolor look. It is this texture that also allows the paper to capture pigment and water without causing the paper to pucker or curl. One last highly useful item is a palette of sorts to test the true color that you will be working with, or to mix colors to get the color exactly to your liking.
A simple yet wonderful palette is a scrap of the same paper you plan on using for your project. That way, when testing color, you can also get a feel for the flow of your colors. It is also useful when you need to remove excess water from your brush or just to have better control of the amount of color being applied to your image.
Now that we have covered the basic supplies needed and have explained why you are using these items, you are invited to follow along step-by-step to learn exactly how to use these tools to bring your stamped images to life. Gather supplies including watercolor pencils, a watercolor brush or water brush, a small jar of water and a scrap piece of paper to use as a palette.
1. Stamp your image onto watercolor paper.

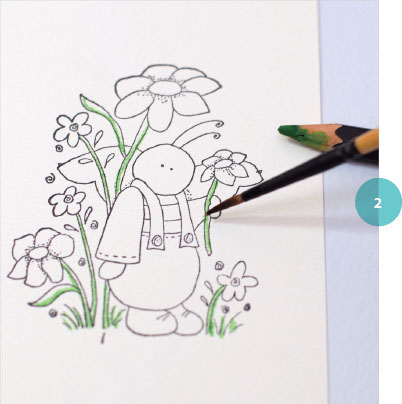
2. Begin by lightly outlining each stem and leaf with a light green watercolor pencil. Moisten just the tip of the watercolor brush and gently blend the color into the open areas of the stems and leaves.
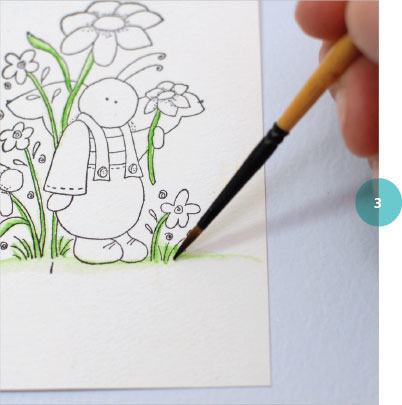
3. At the base near the grass, moisten the brush once again and gently blend the color from the grass areas, drawing the watercolor brush to the edges of the paper. Use water sparingly at this point, only remoistening the tip of your brush as needed to blend and drag the color.
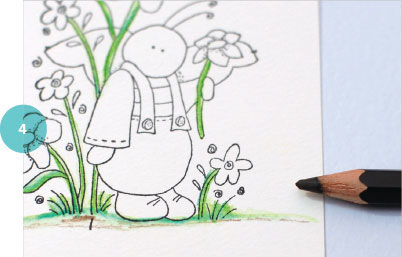
4. Add additional colors to the base of the grass area using small light strokes, blending as shown before, using just a bit more water than the first time. Apply color sparingly, as you can always layer in more color, but it can be hard to remove color or keep it just where you intend it to be when using water as your blending agent.
5. Add a thicker line of color around the outside of the flower centers. Wet your brush; wiggle the tip of the paintbrush in the color and drag the color outward to- ward the tip of each petal. The color will wash lightly out to the end of the petals.

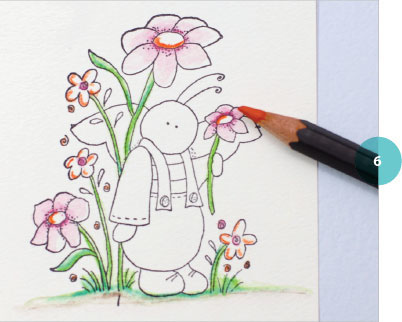
6. Add color to the centers of the flowers, this time taking care to apply it to the bottom left of each center and petals of the smaller flowers. Applying color in this way will begin to start the shading of your image. It will cause the image to appear as if there is a light source in the top right corner of your image. Blend the color up toward the top right of each section.
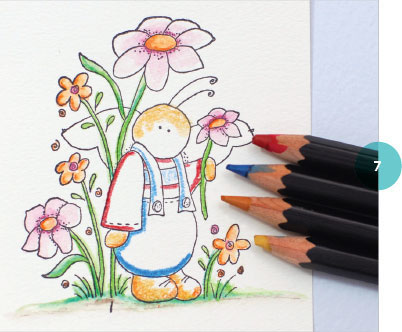
7. Apply color to the rest of the bug image, applying it more heavily to the left. Using a wet brush tip as before, wiggle and drag the color into the open area, mak- ing sure to leave some areas much lighter than others, to give good contrast and shading.
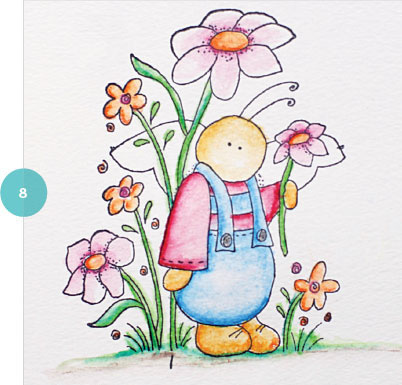
8. Once you have applied all of the color you desire, you should have an image that looks similar to this one.
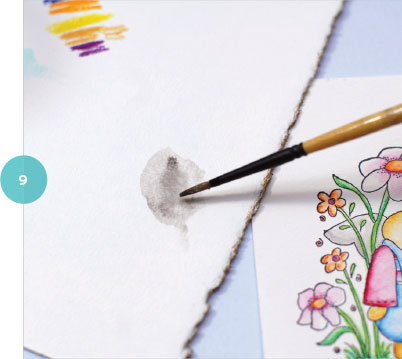
9. Scribble a small “puddle” of black and white onto your scrap paper palette. Drip a small portion of water into the color and begin to blend the colors together. Apply the color first directly from the palette to the left side of the wing and drag it to the top right.
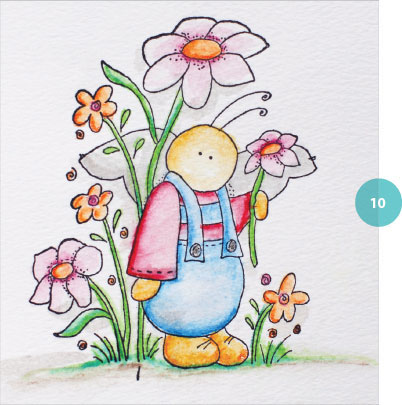
10. As a finishing touch, add a bit of shadow beneath the largest flower and to the top surface of the left side of the grass. This gives the image the appearance of a shadow cast from the “light source” at the top right of the image. Use your water- colored image to create your finished project.