
Follow the instructions here to practice the basic method for blending and layering color before proceeding with the other techniques for colored pencils. It will give you a good start. Take a look at the finished samples here to get inspiration for your next project.
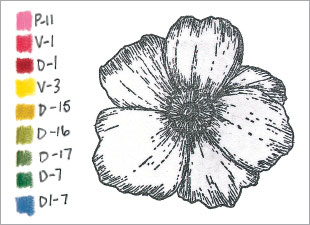
Stamp the image, then choose your colors. For this image, I selected three shades of pink for the flower, two shades of yellow for the center, three shades of green for the leaves, and a blue for a halo around the final image. You can draw a small sampling of the colors and their numbers to refer to as you work.
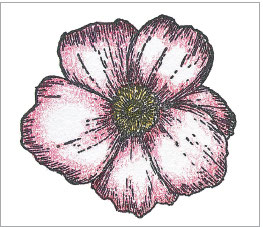
With the lightest colors and a very light touch, start to block in the color fields. Use the markings on the stamped image as your guide for values. Keep the pressure and color light, or you will crush the fibers that create teeth in your paper and be unable to layer more colors on top. Make sure you always have a sharp point: a dull pencil will result in tiny white spots of paper showing through.
With the next layers of color, slightly overlap the first color and maintain a very light touch. Keep adding to your color fields, following the contour of the image. Keep layering and going over all the colors, blending them with graduating values. Try to make sure you do not see any obvious pencil strokes.
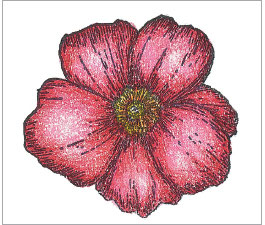
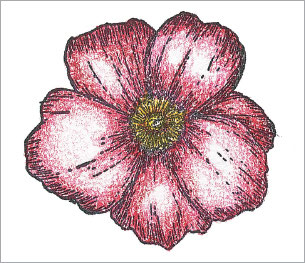
Continue adding to your color fields. You now want to go over all the colors, blending them with light layers on top. By the end, you are applying more pressure as you build up the intensity of the colors. Pay close attention to where the color meets the stamped outline of the motif. Tiny white spaces are easily missed and become distracting in the final coloring.
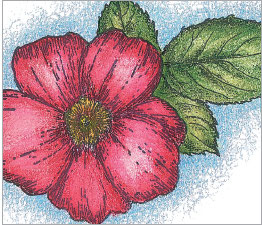
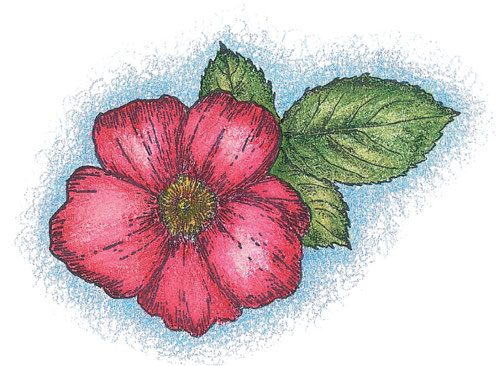
Add a leaf using the masking technique and color it in. Add a light blue halo using the scumbling technique. Using the colorless blender, work from the lightest to the darkest colors to softly blend the colors together. If you cover up the light highlights when blending, wait for the piece to dry, and then bring back the highlights using the sand eraser.